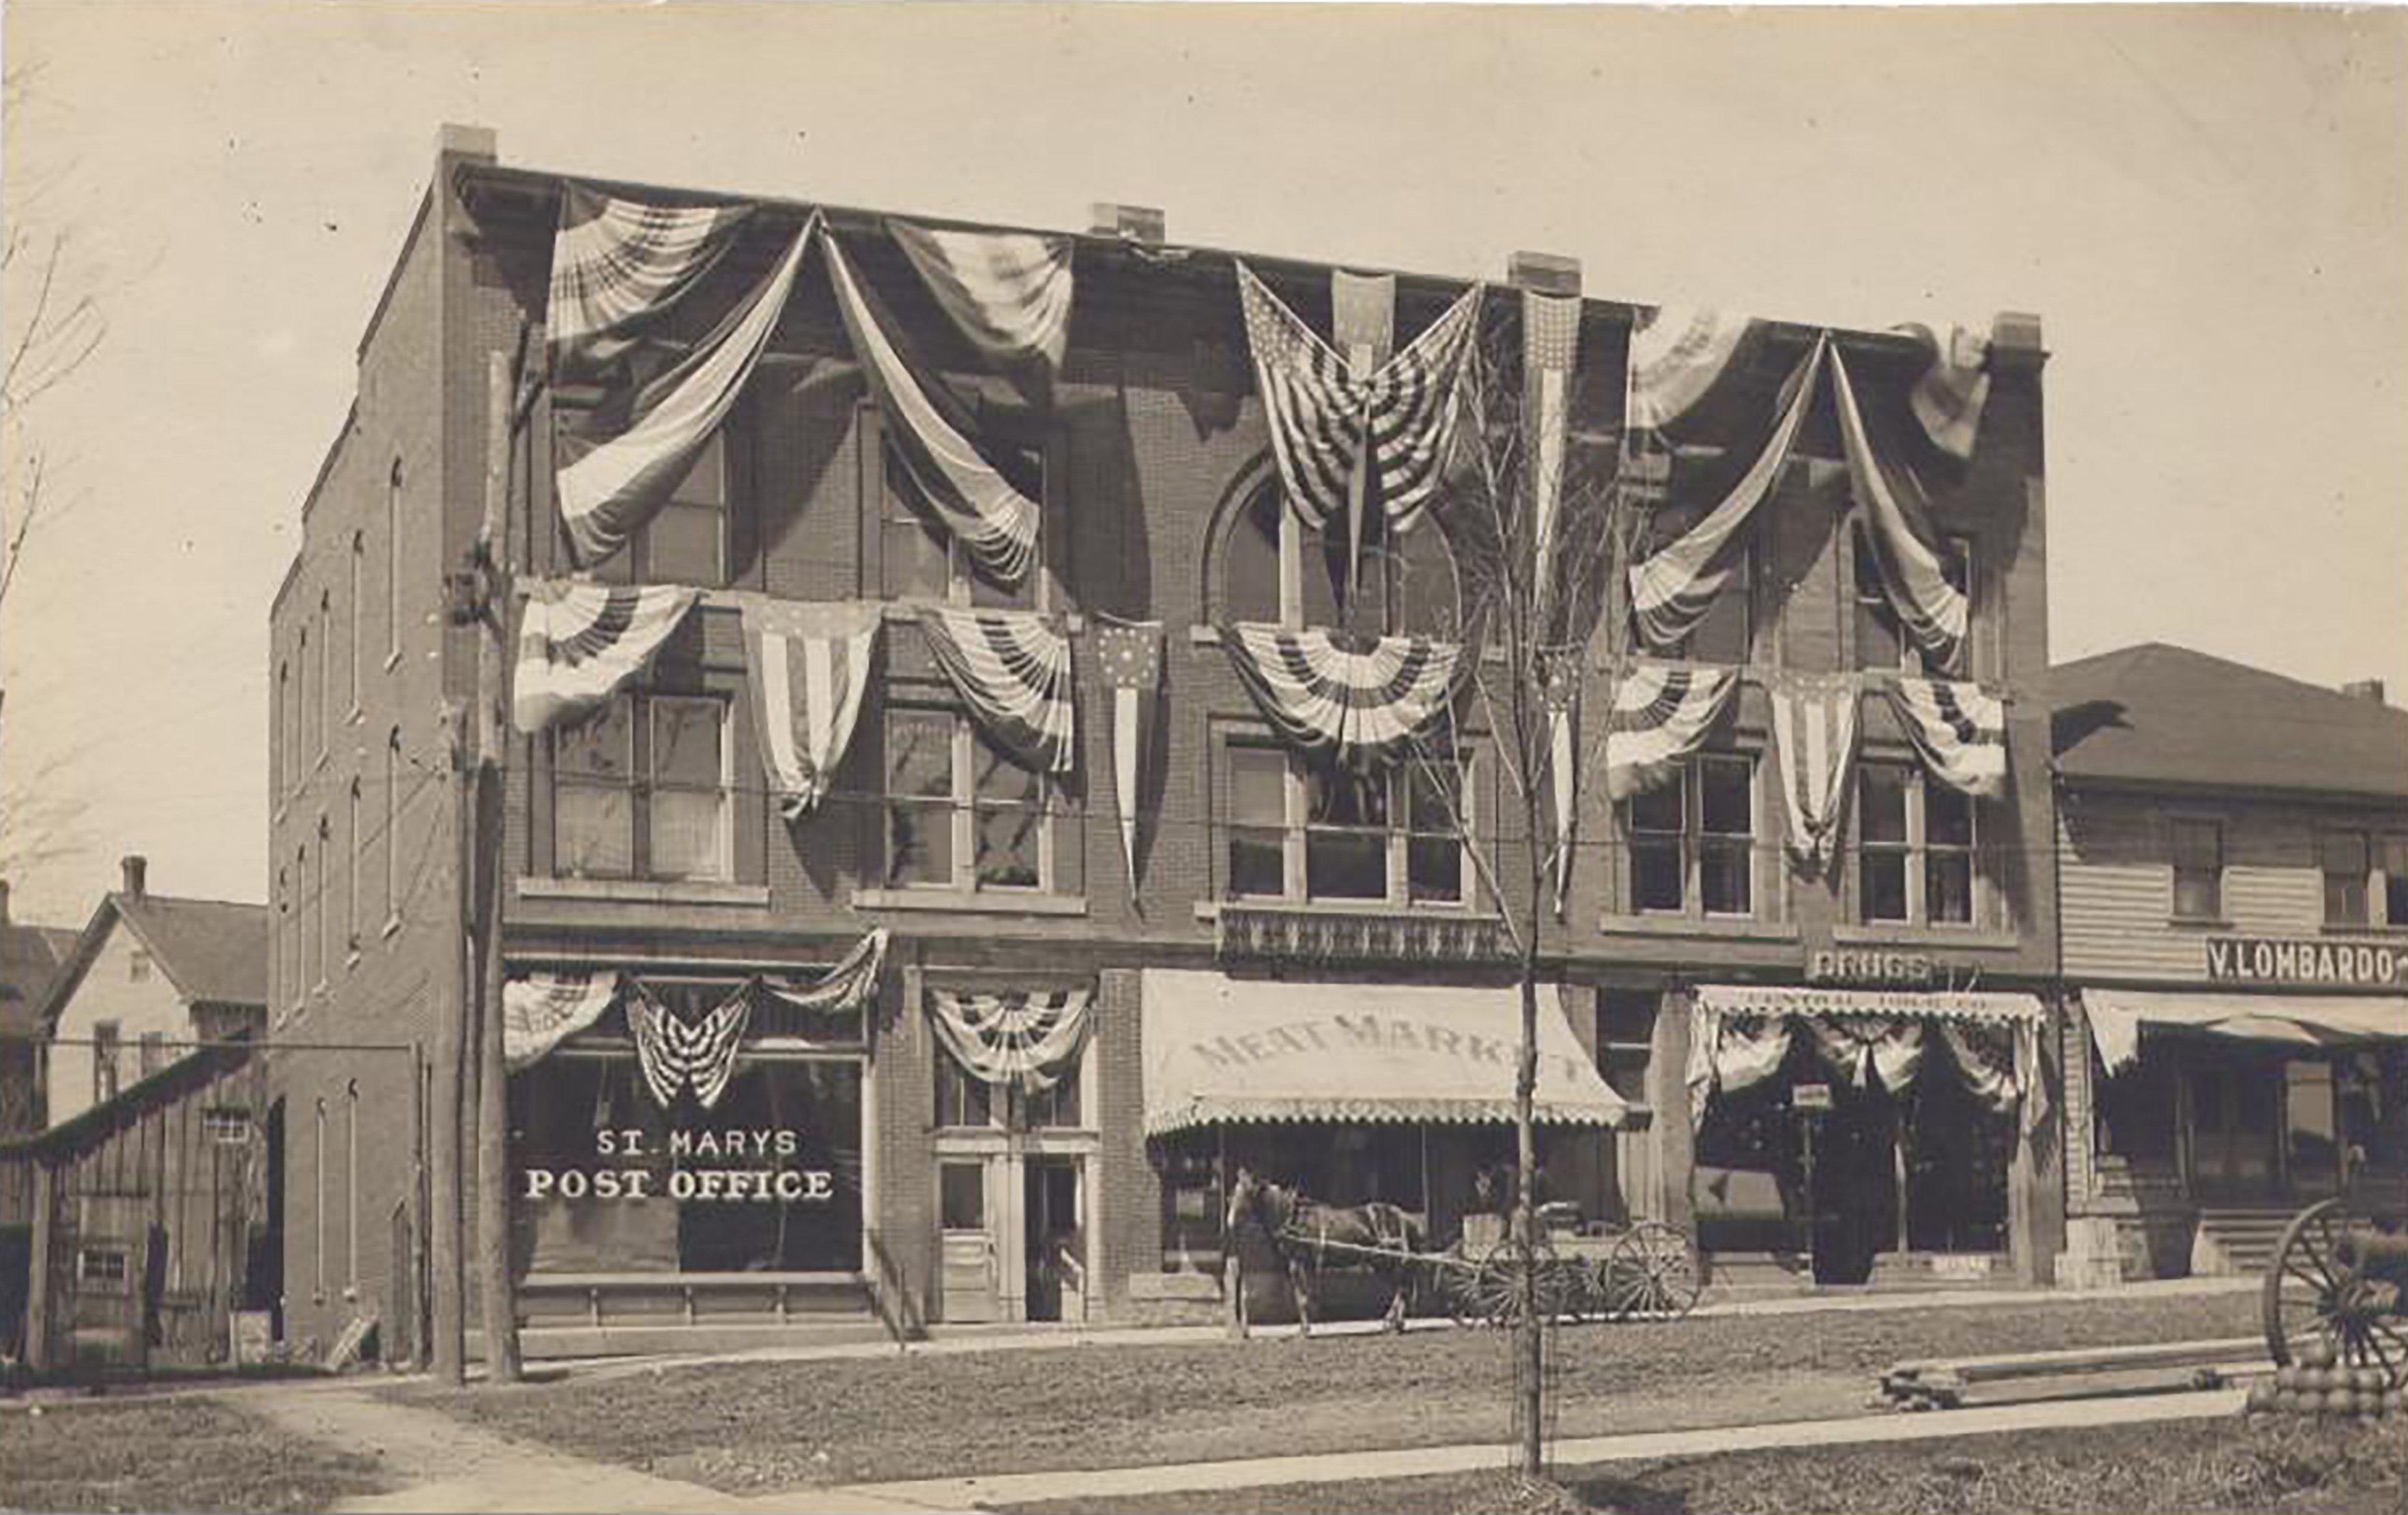
The purpose of this image assignment was to practice the skills of black and white photo restoration, photo colorization, matting, and creating a vignette effect. For my photo colorization, I selected a black and white photograph of Lion’s Meat Market that was located in my hometown of Saint Marys, PA (top image). Before I started colorizing the photo, I had to perform some basic repair because the photo was severely faded and overexposed. Because the original image was of a very low resolution (150px), I also increased the resolution to add the necessary pixels for colorization.
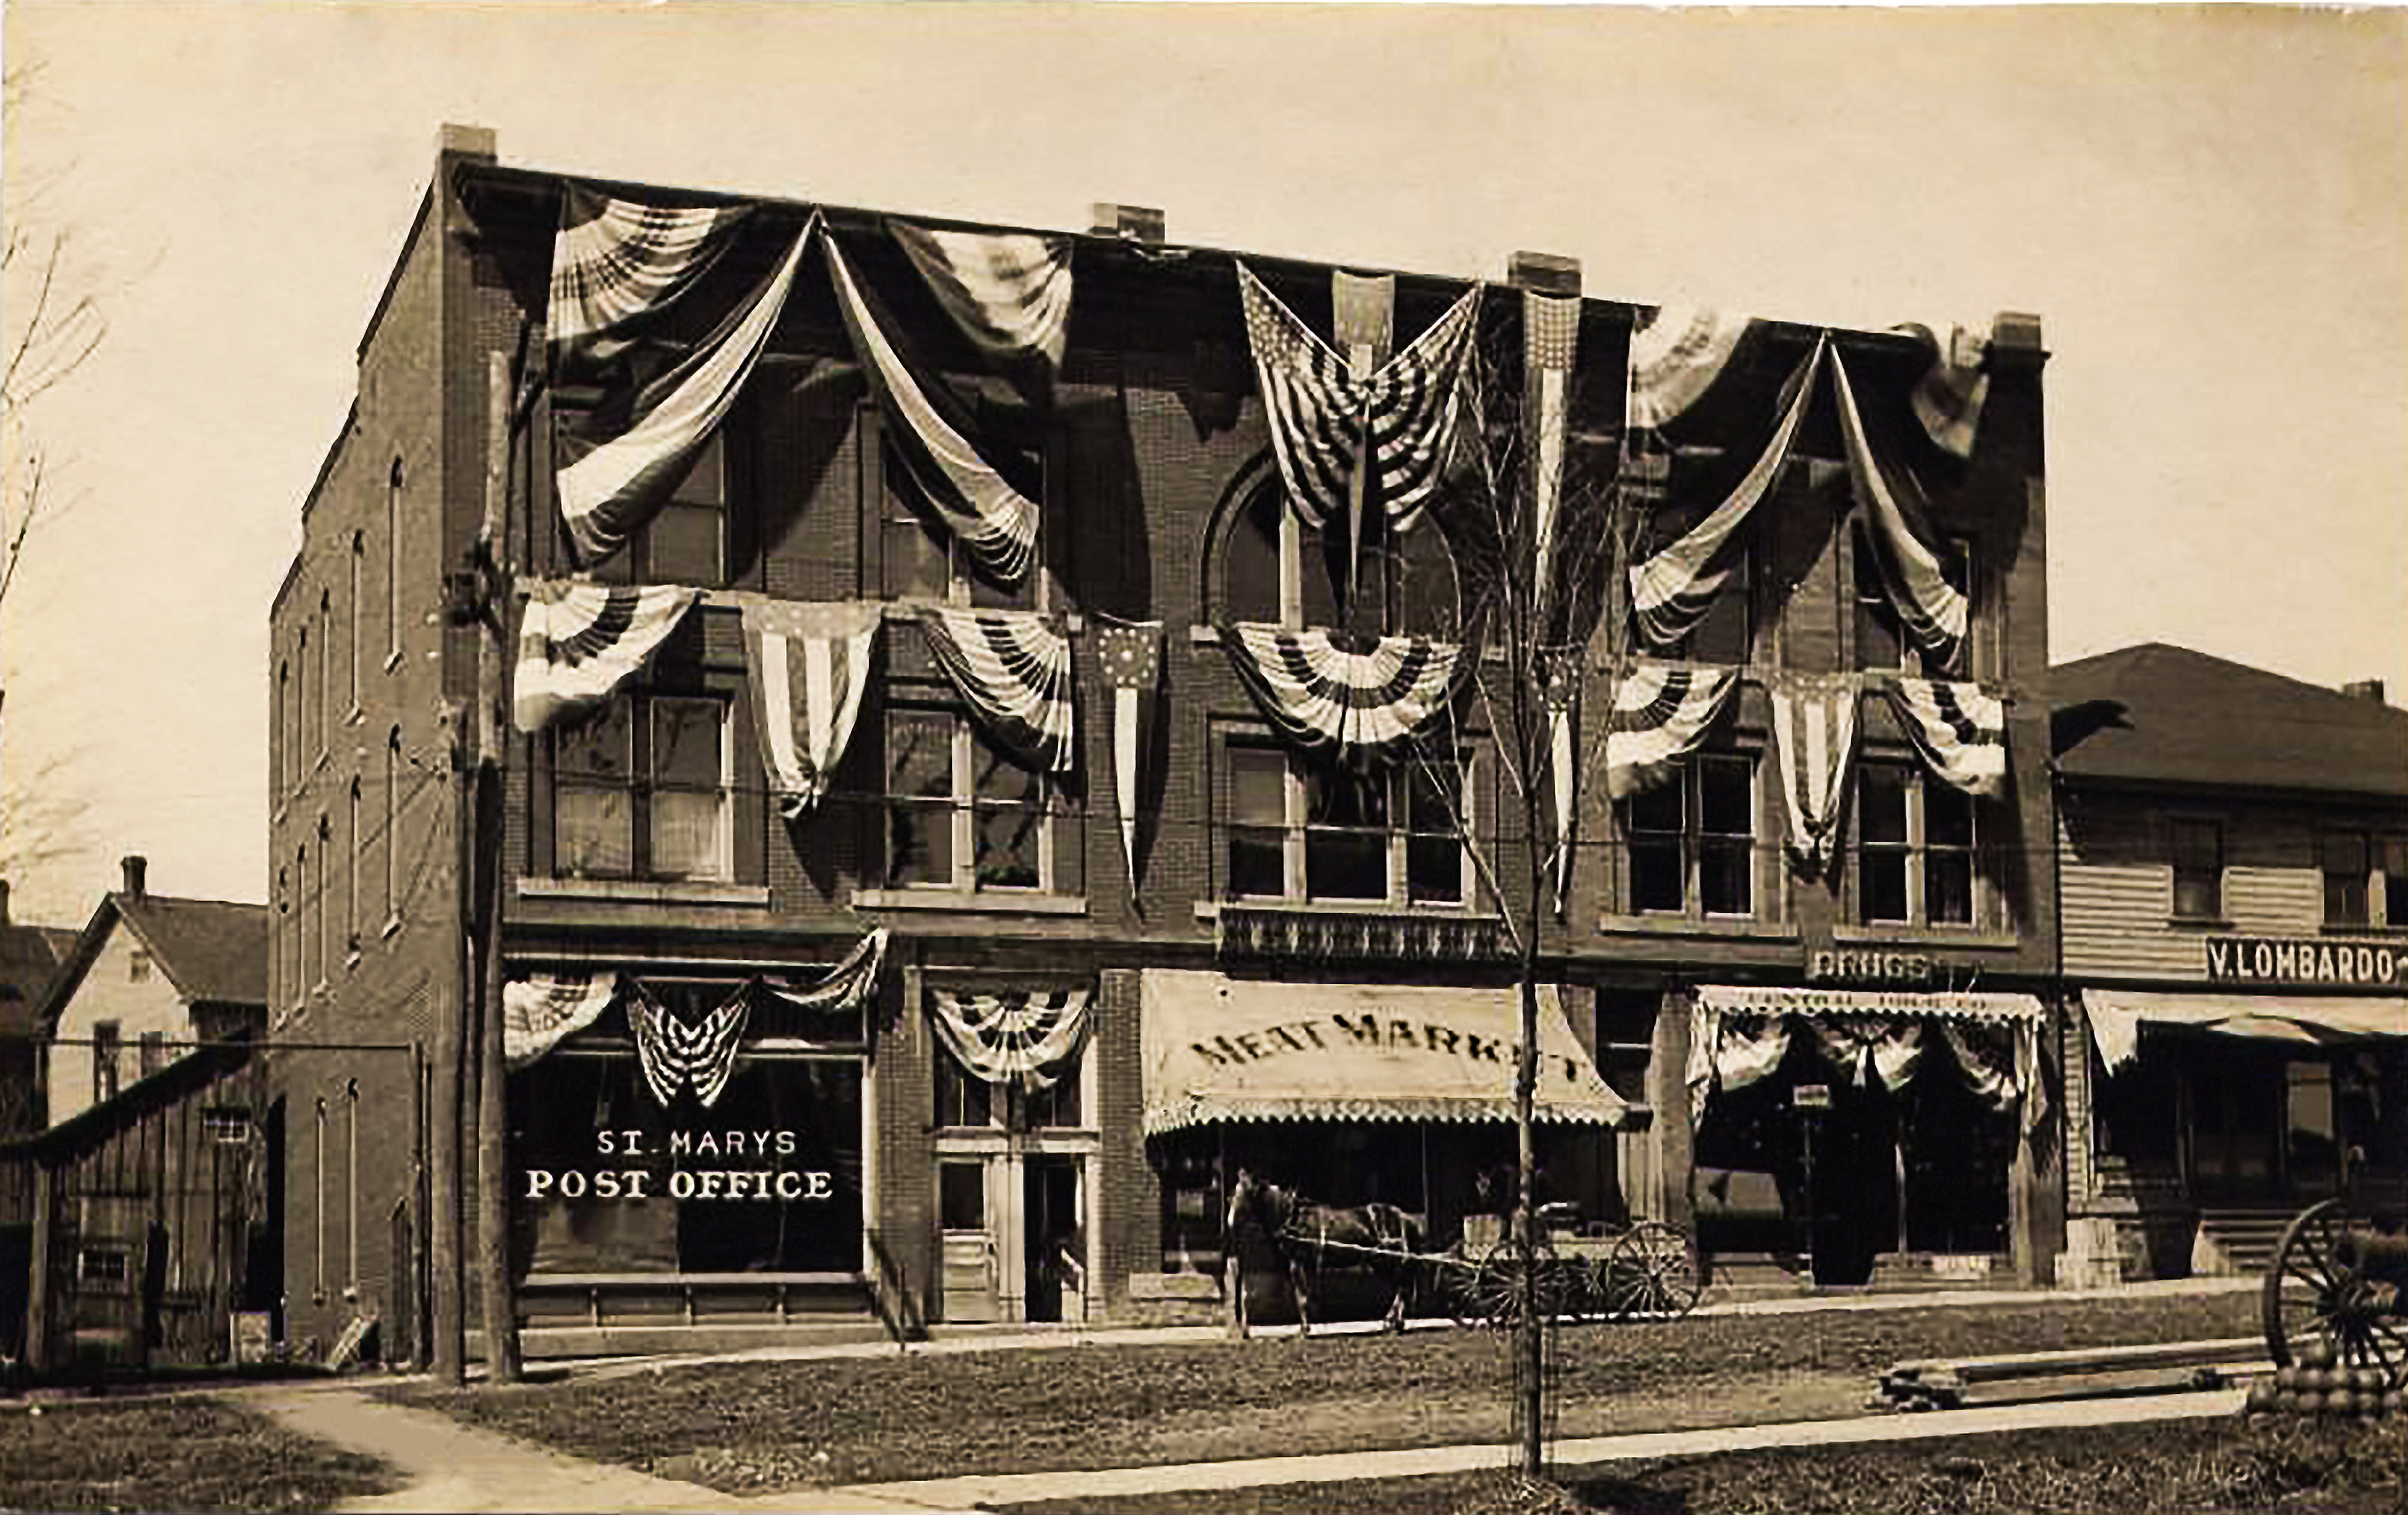
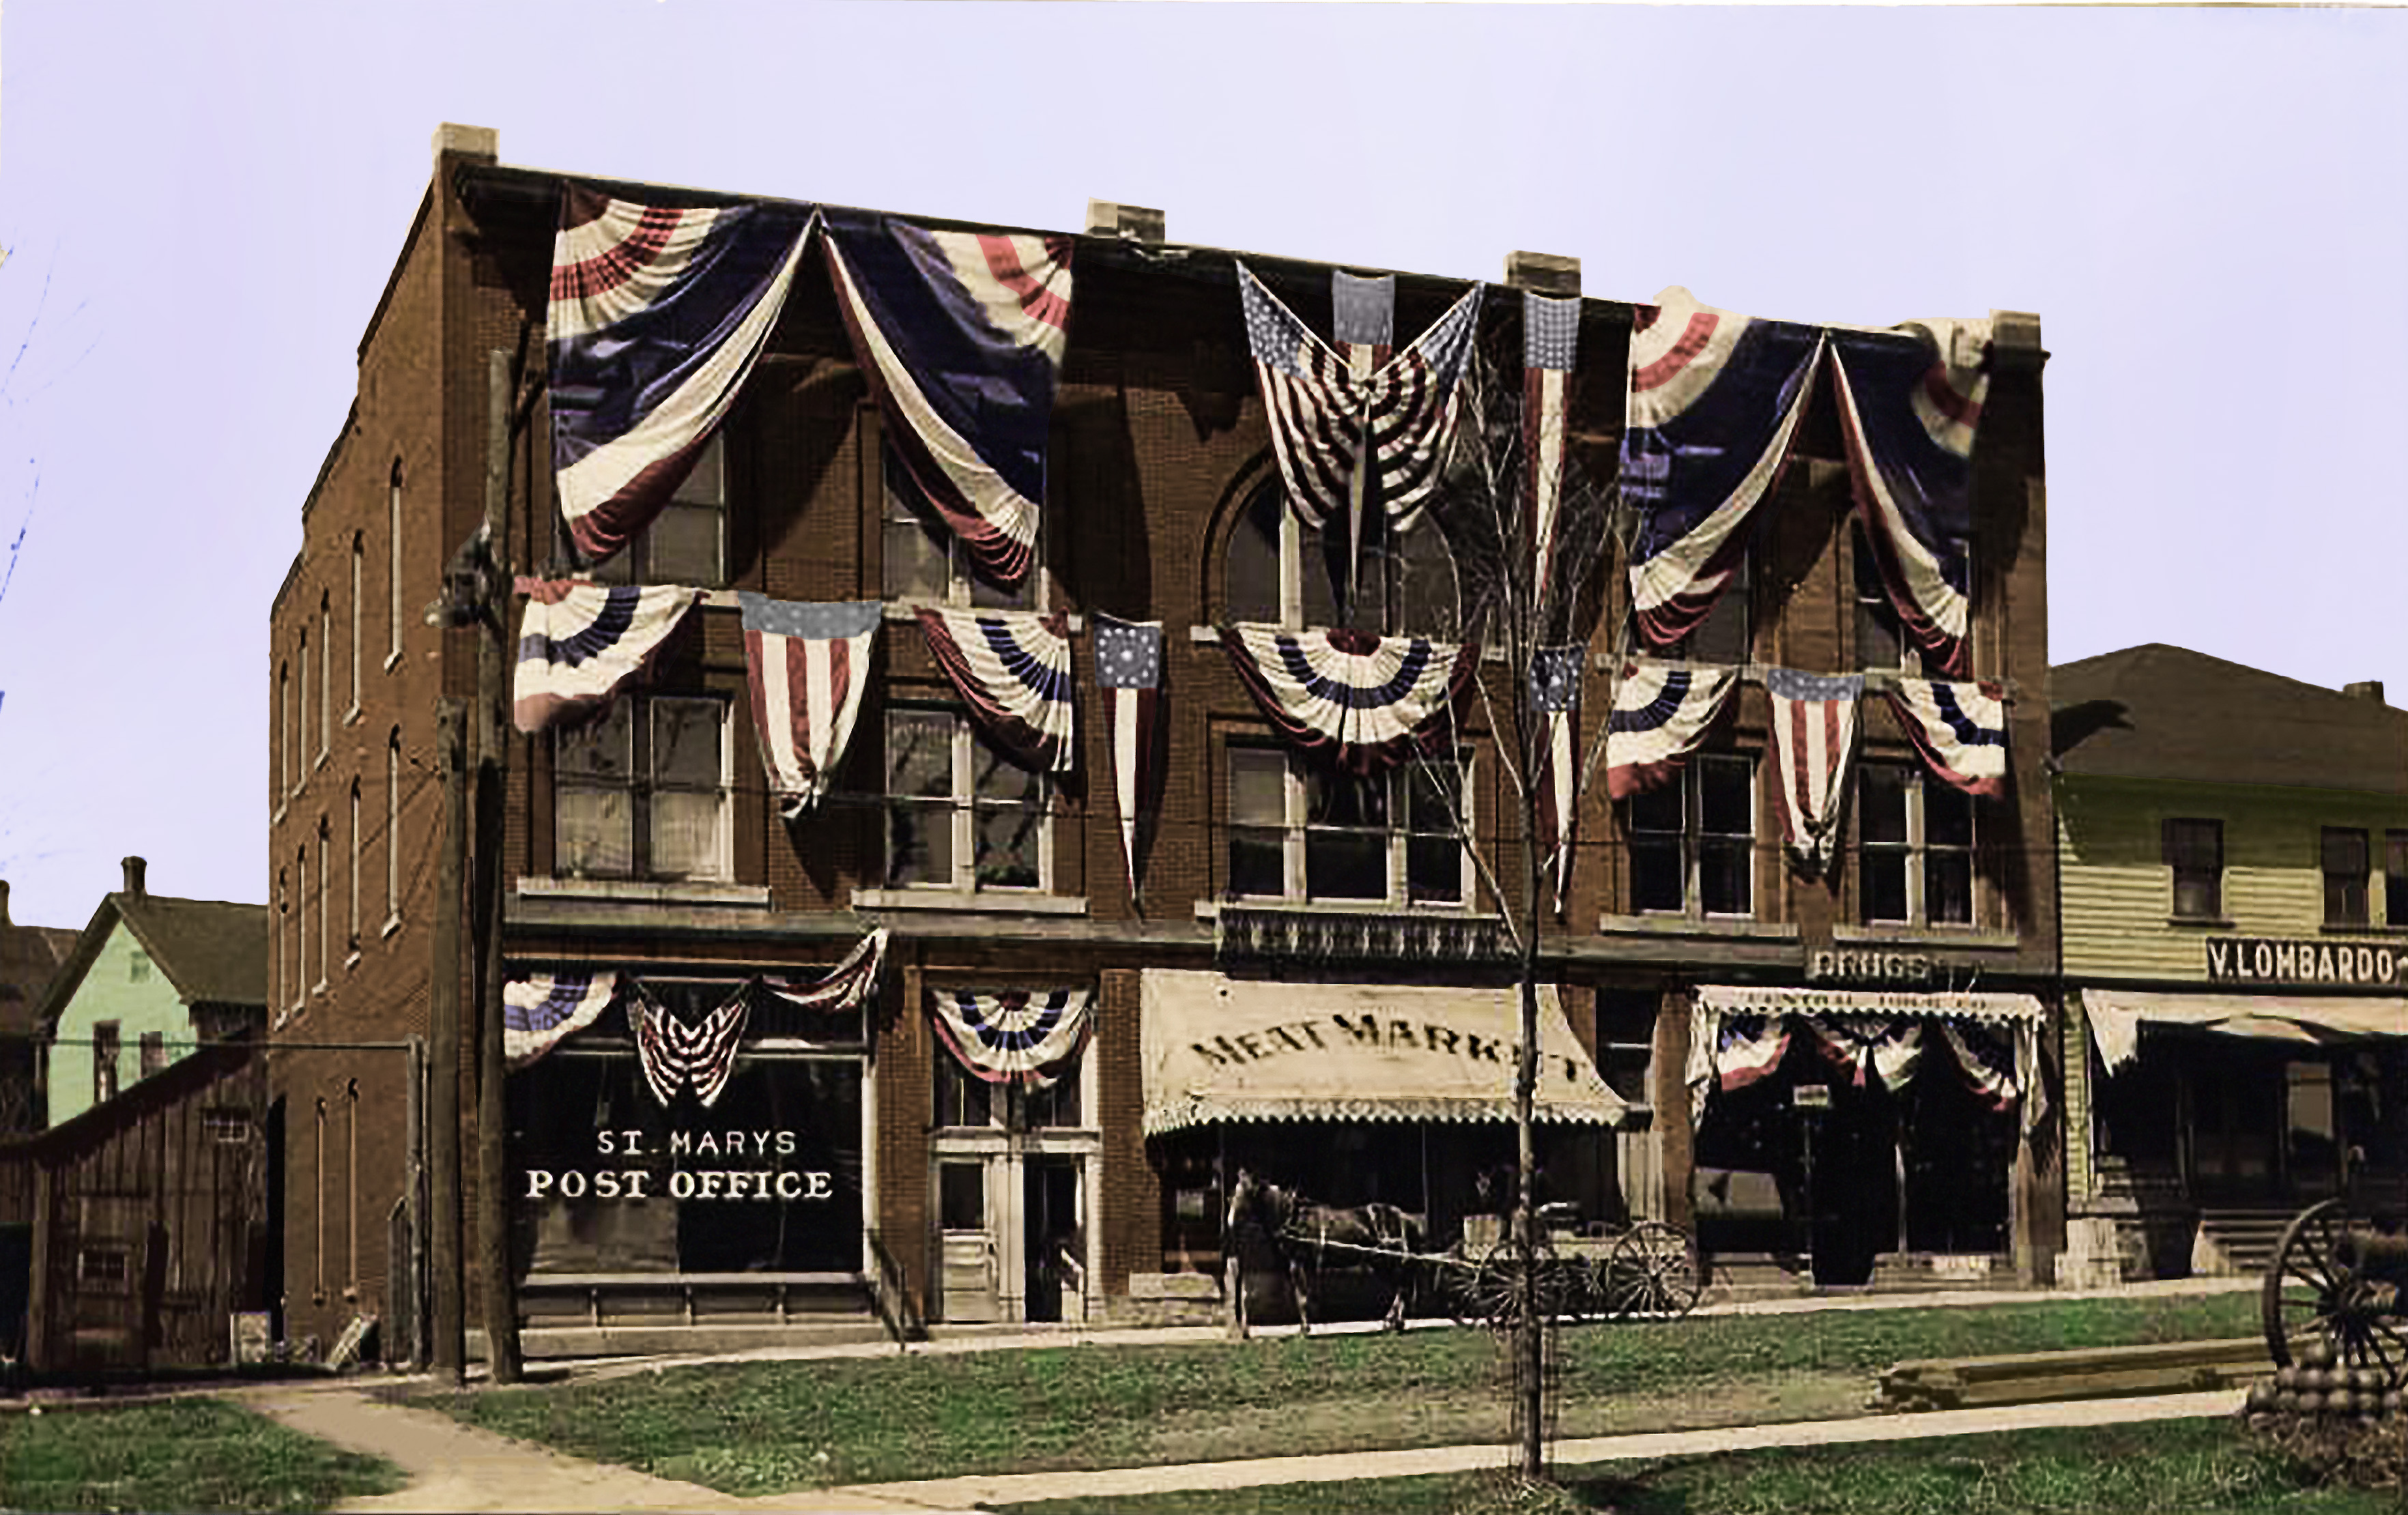
First, I used Photoshop’s “Camera Raw Filter” function to adjust the exposure, contrast, highlights, shadows, whites, blacks, and clarity. I also specifically selected the “Meat Market” awning in order to restore the faded lettering by adjusting the contrast, clarity, and brightness. The results of these steps can be seen in the middle image (below). In order to colorize the photo, I created a separate layer for each element in the photograph. I then used a soft brush with between 40%-75% transparency to add the color. For several of the extremely faded elements, such as the American flags, it was necessary to darken them before colorization. Without darkening those elements, they appeared disproportionately bright compared to the rest of the photograph. Similarly, I had to brighten out the sky in order to remove the overcast. This also caused several of the lighter branches of the tree located in the bottom left to disappear. The result of the colorization can be seen in the bottom image (below).
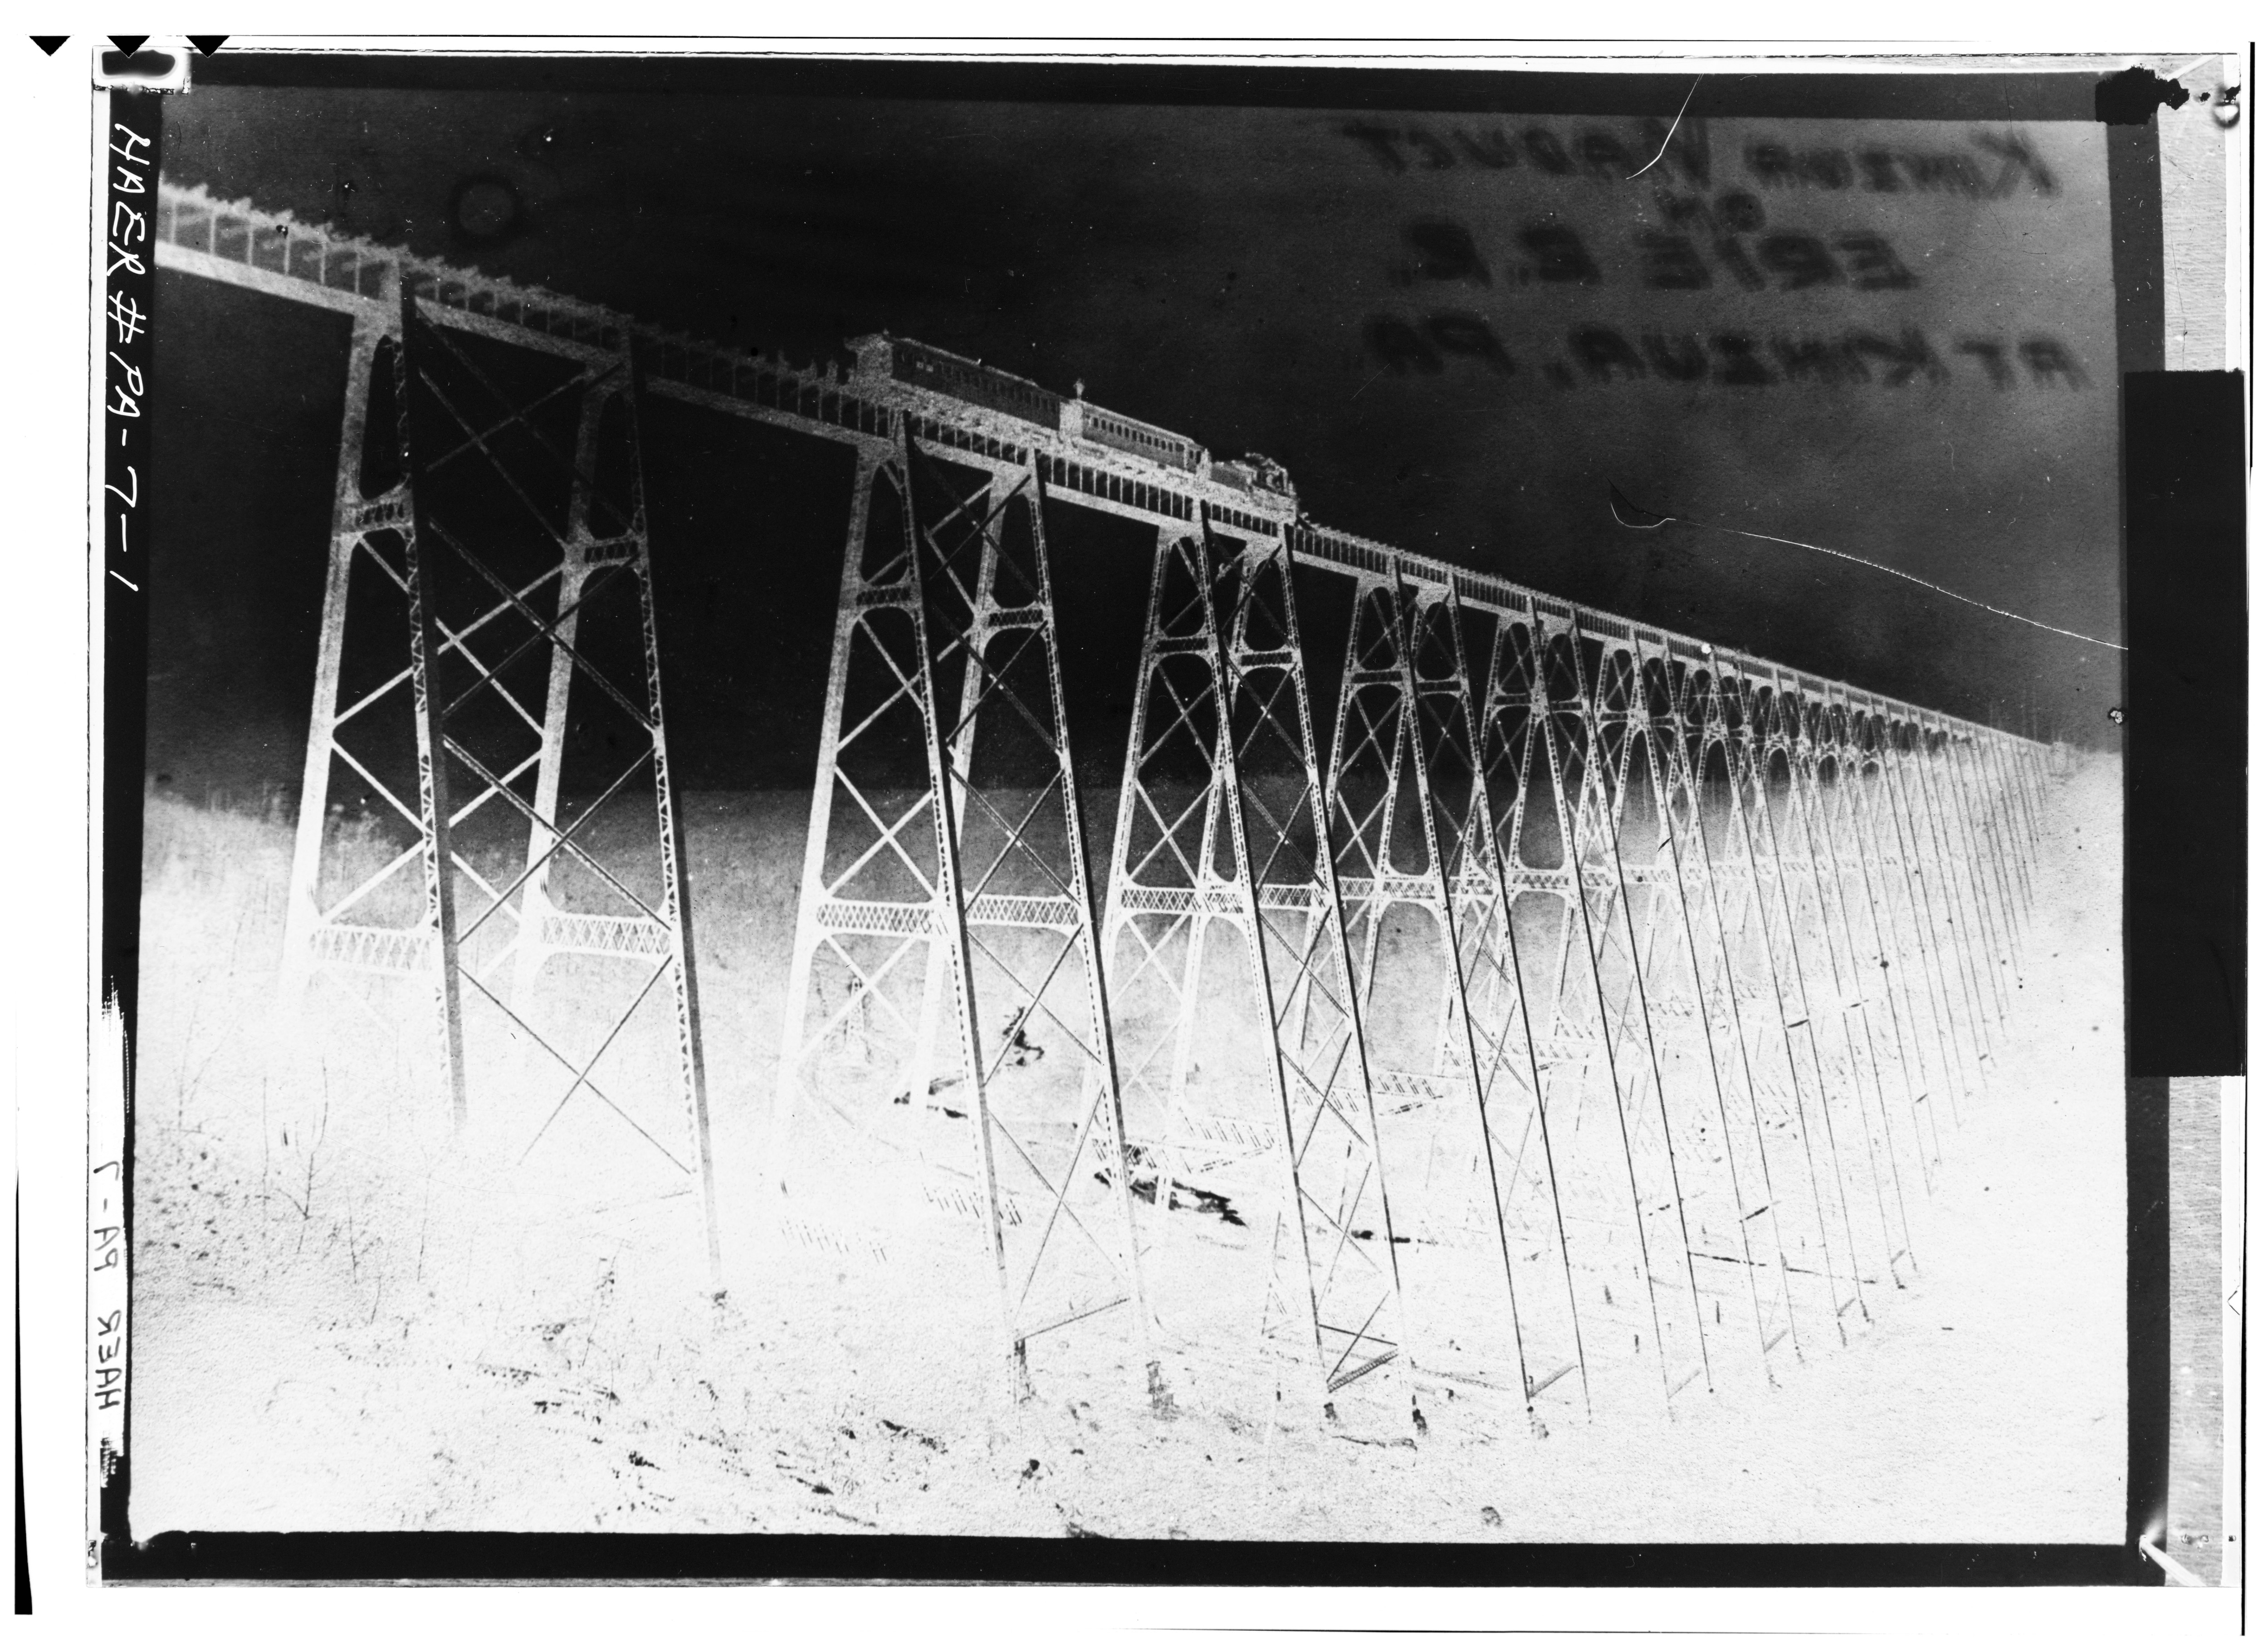
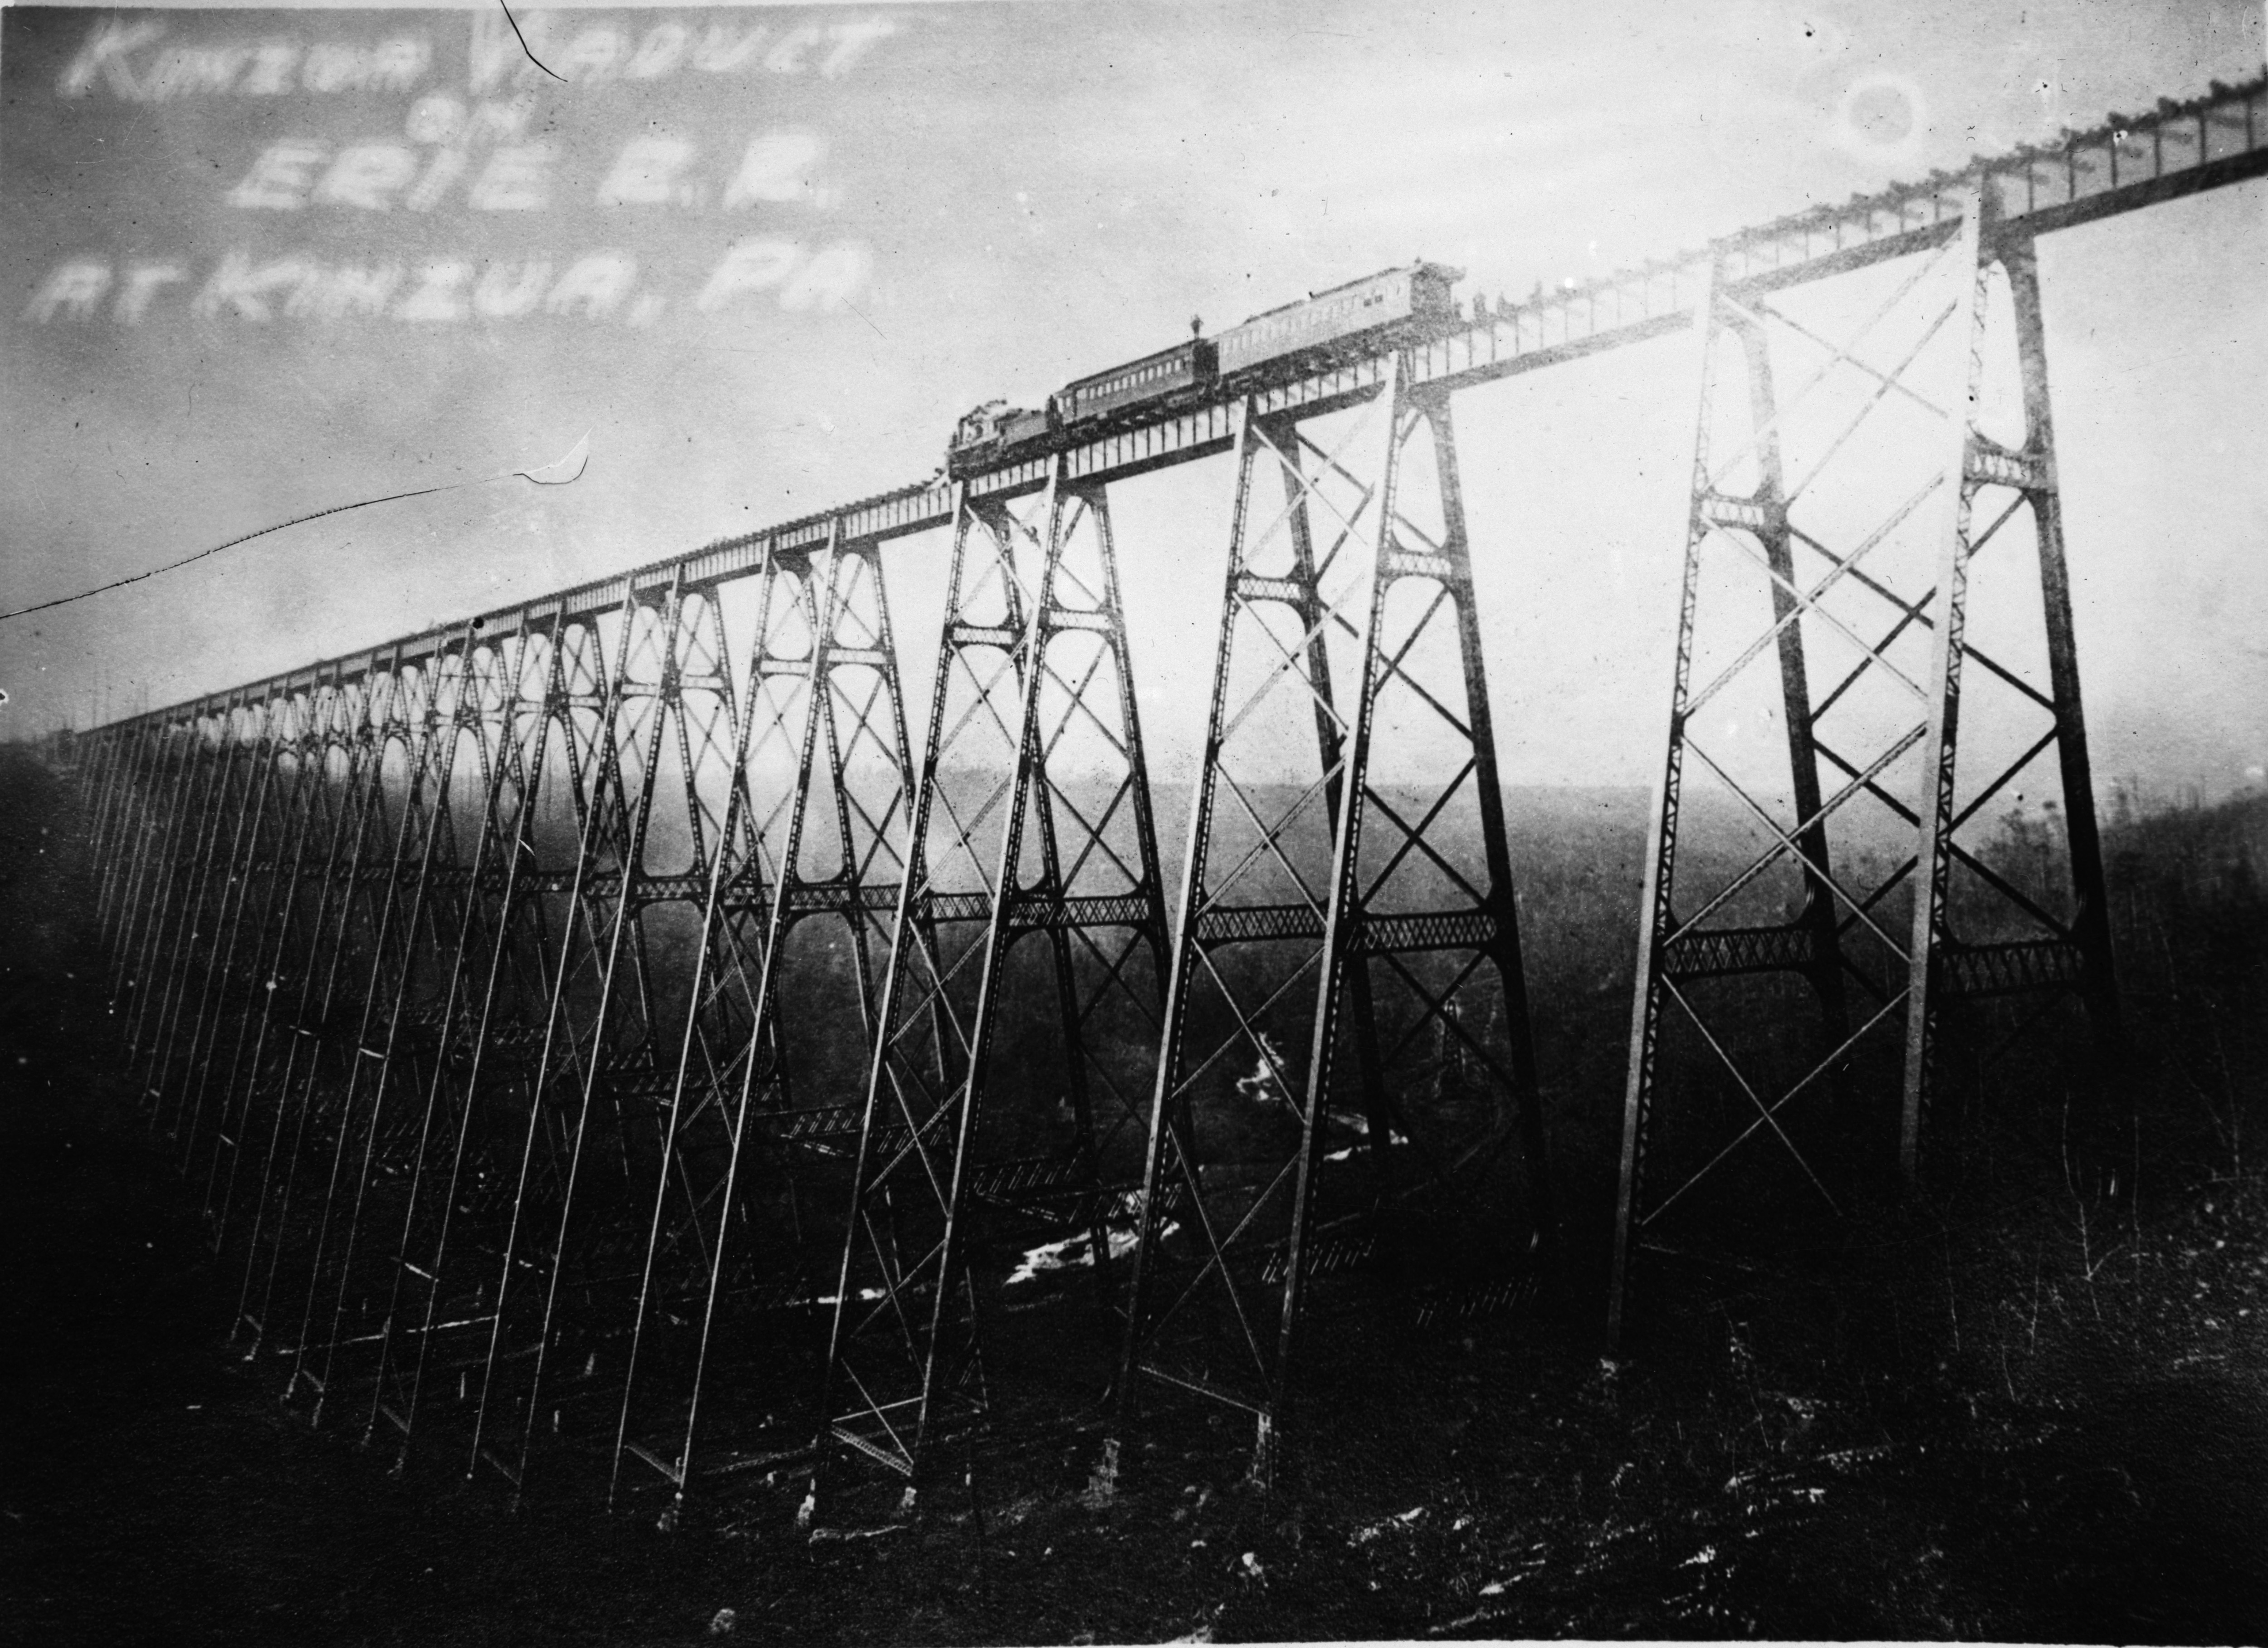
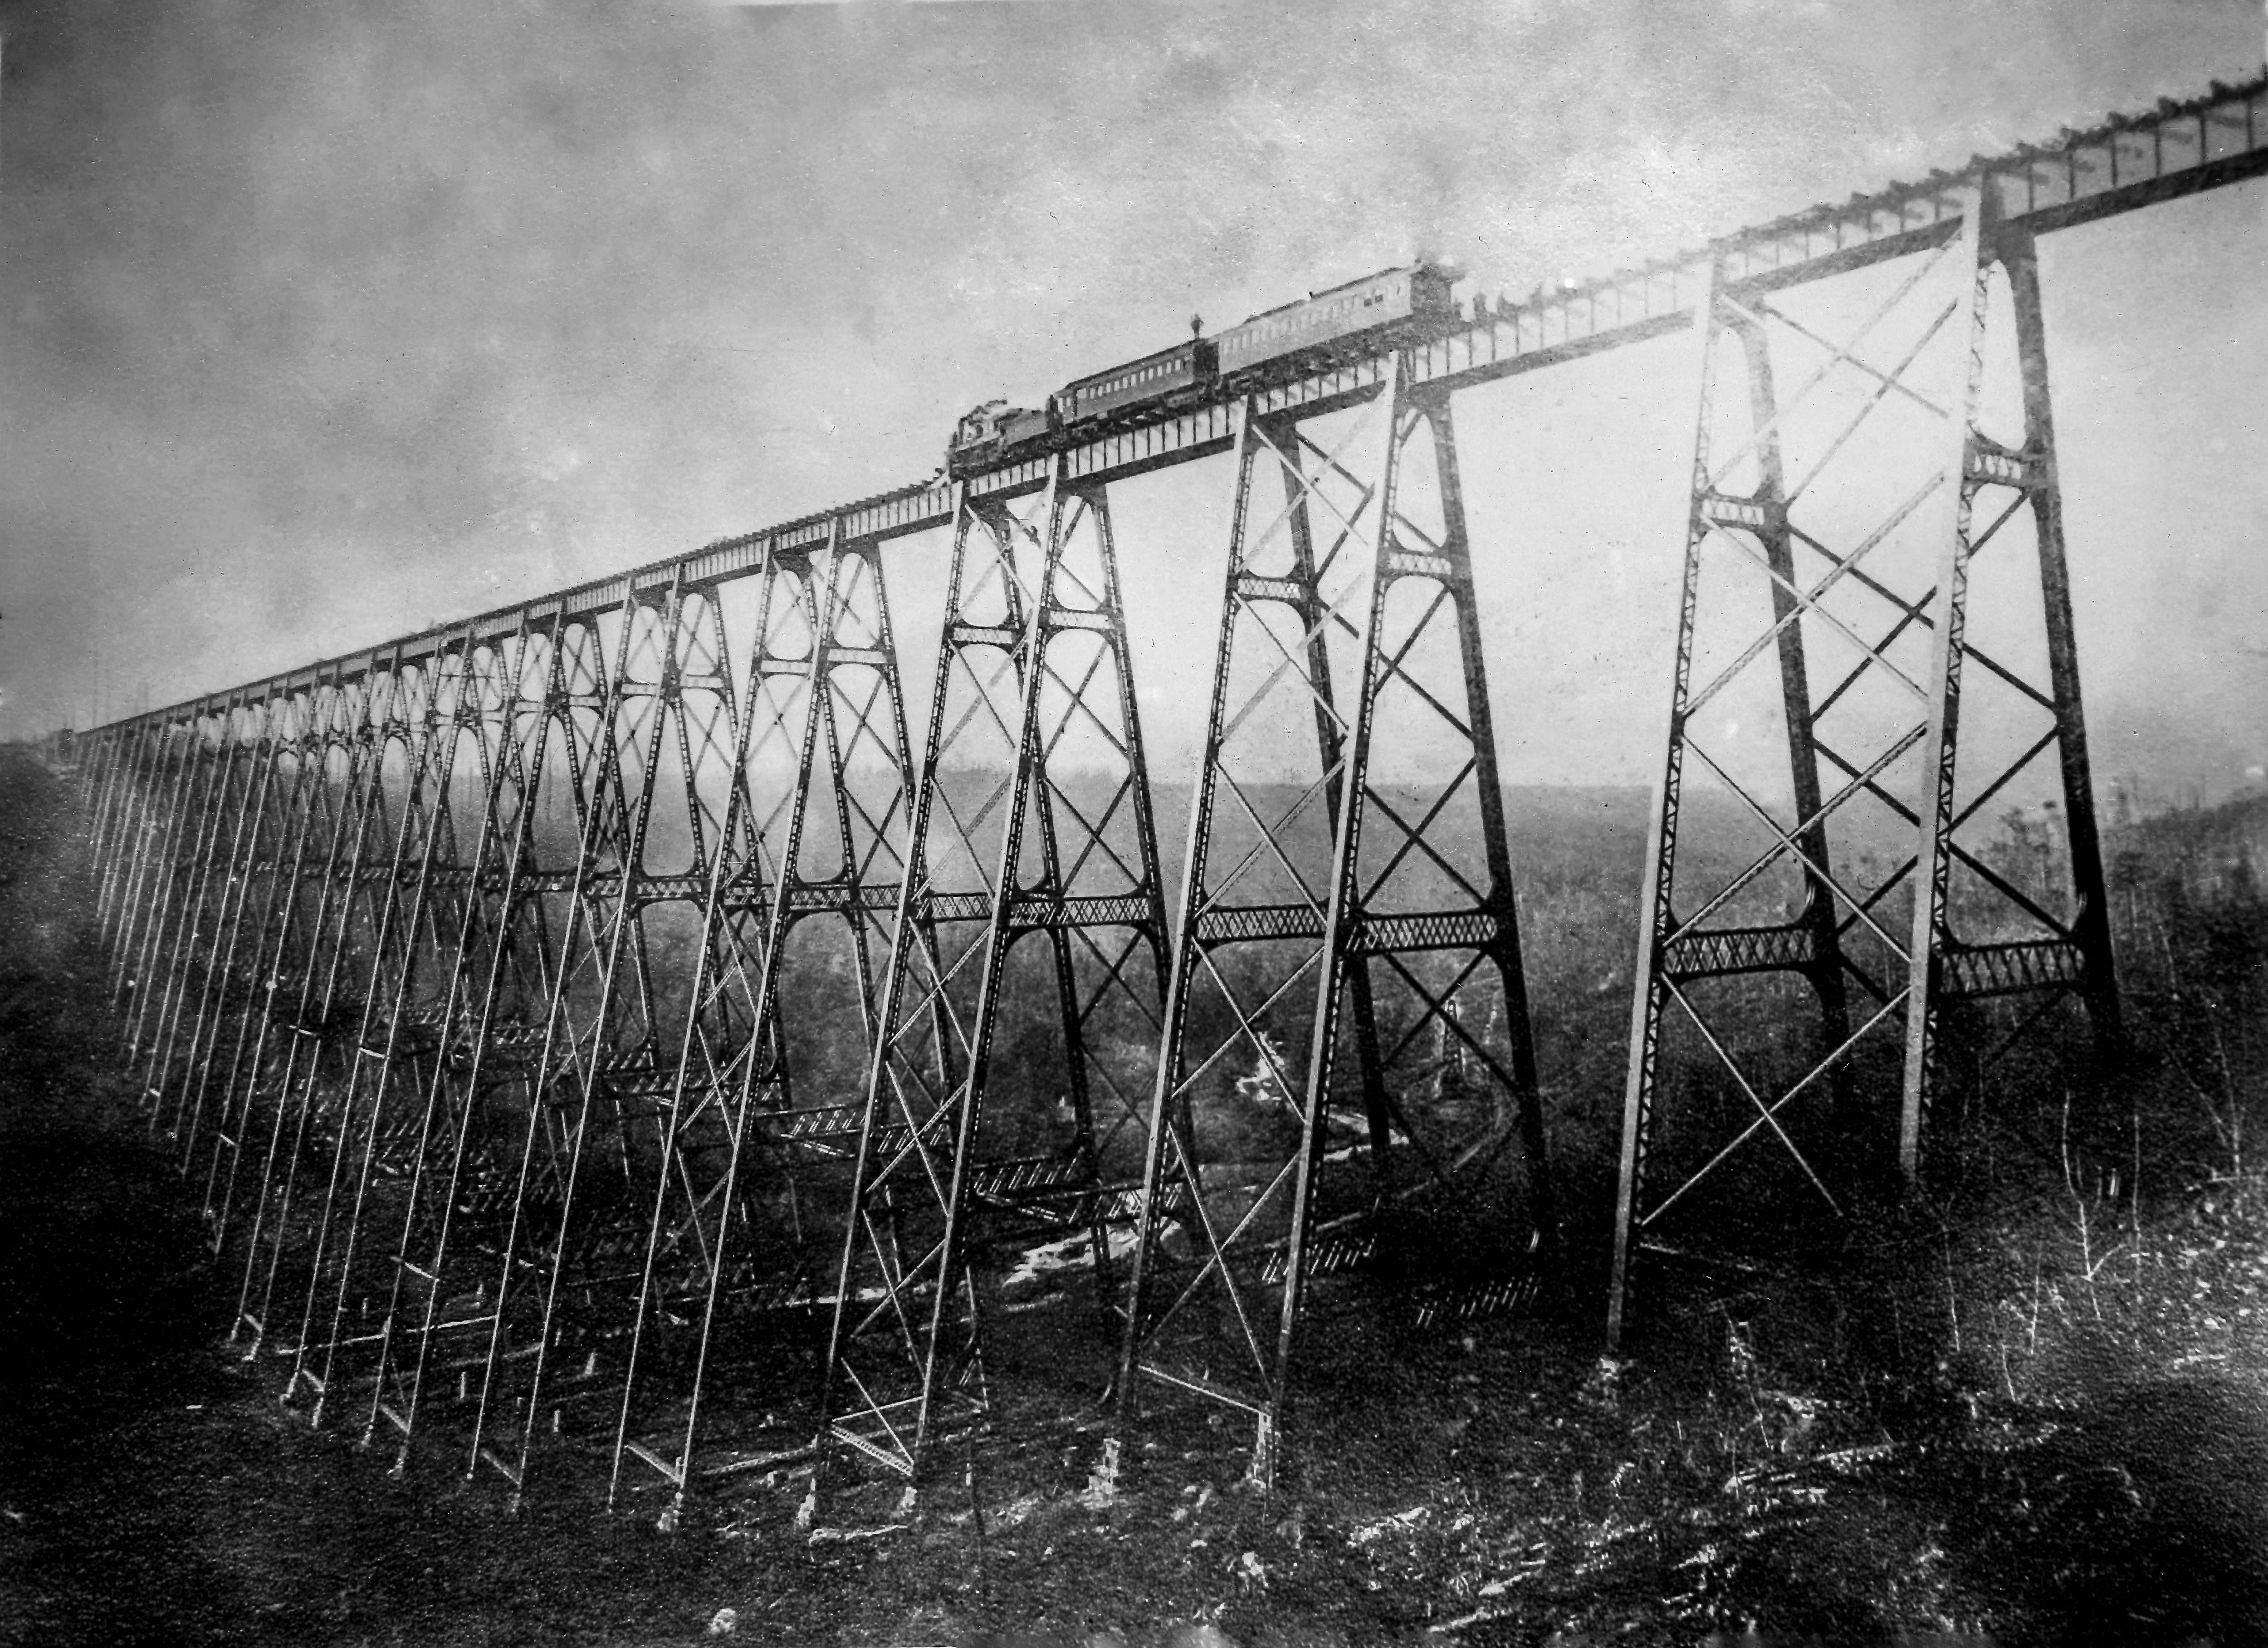
For my black and white photo restoration, I chose an image of the Kinzua viaduct near Kane, PA. I located the negative of this image on the Library of Congress website. In order to bring the detail of this image back, I had to perform several steps. First, I flipped the image horizontally and inverted the colors to eliminate the negative. I used the lens correction feature to remove the bubble effect. I then cropped and rotated the image. I also used the shake reduction tool to help sharpen the image. Next, I used the spot healing brush and the healing brush tools to repair the specs, cracks, and other blemishes in the image. I also removed the lettering in the top left corner. The most difficult task was trying to compensate for the bright sun glare and dark undergrowth at the bottom of the image. This contrast necessitated using both the “Camera Raw Filter” function and adjusting the low, mid, and high tones using the curve tool. I am still not entirely satisfied with the result, but it does make portions of the photo visible again.
P.S. Notice the individual standing on top of the train car!
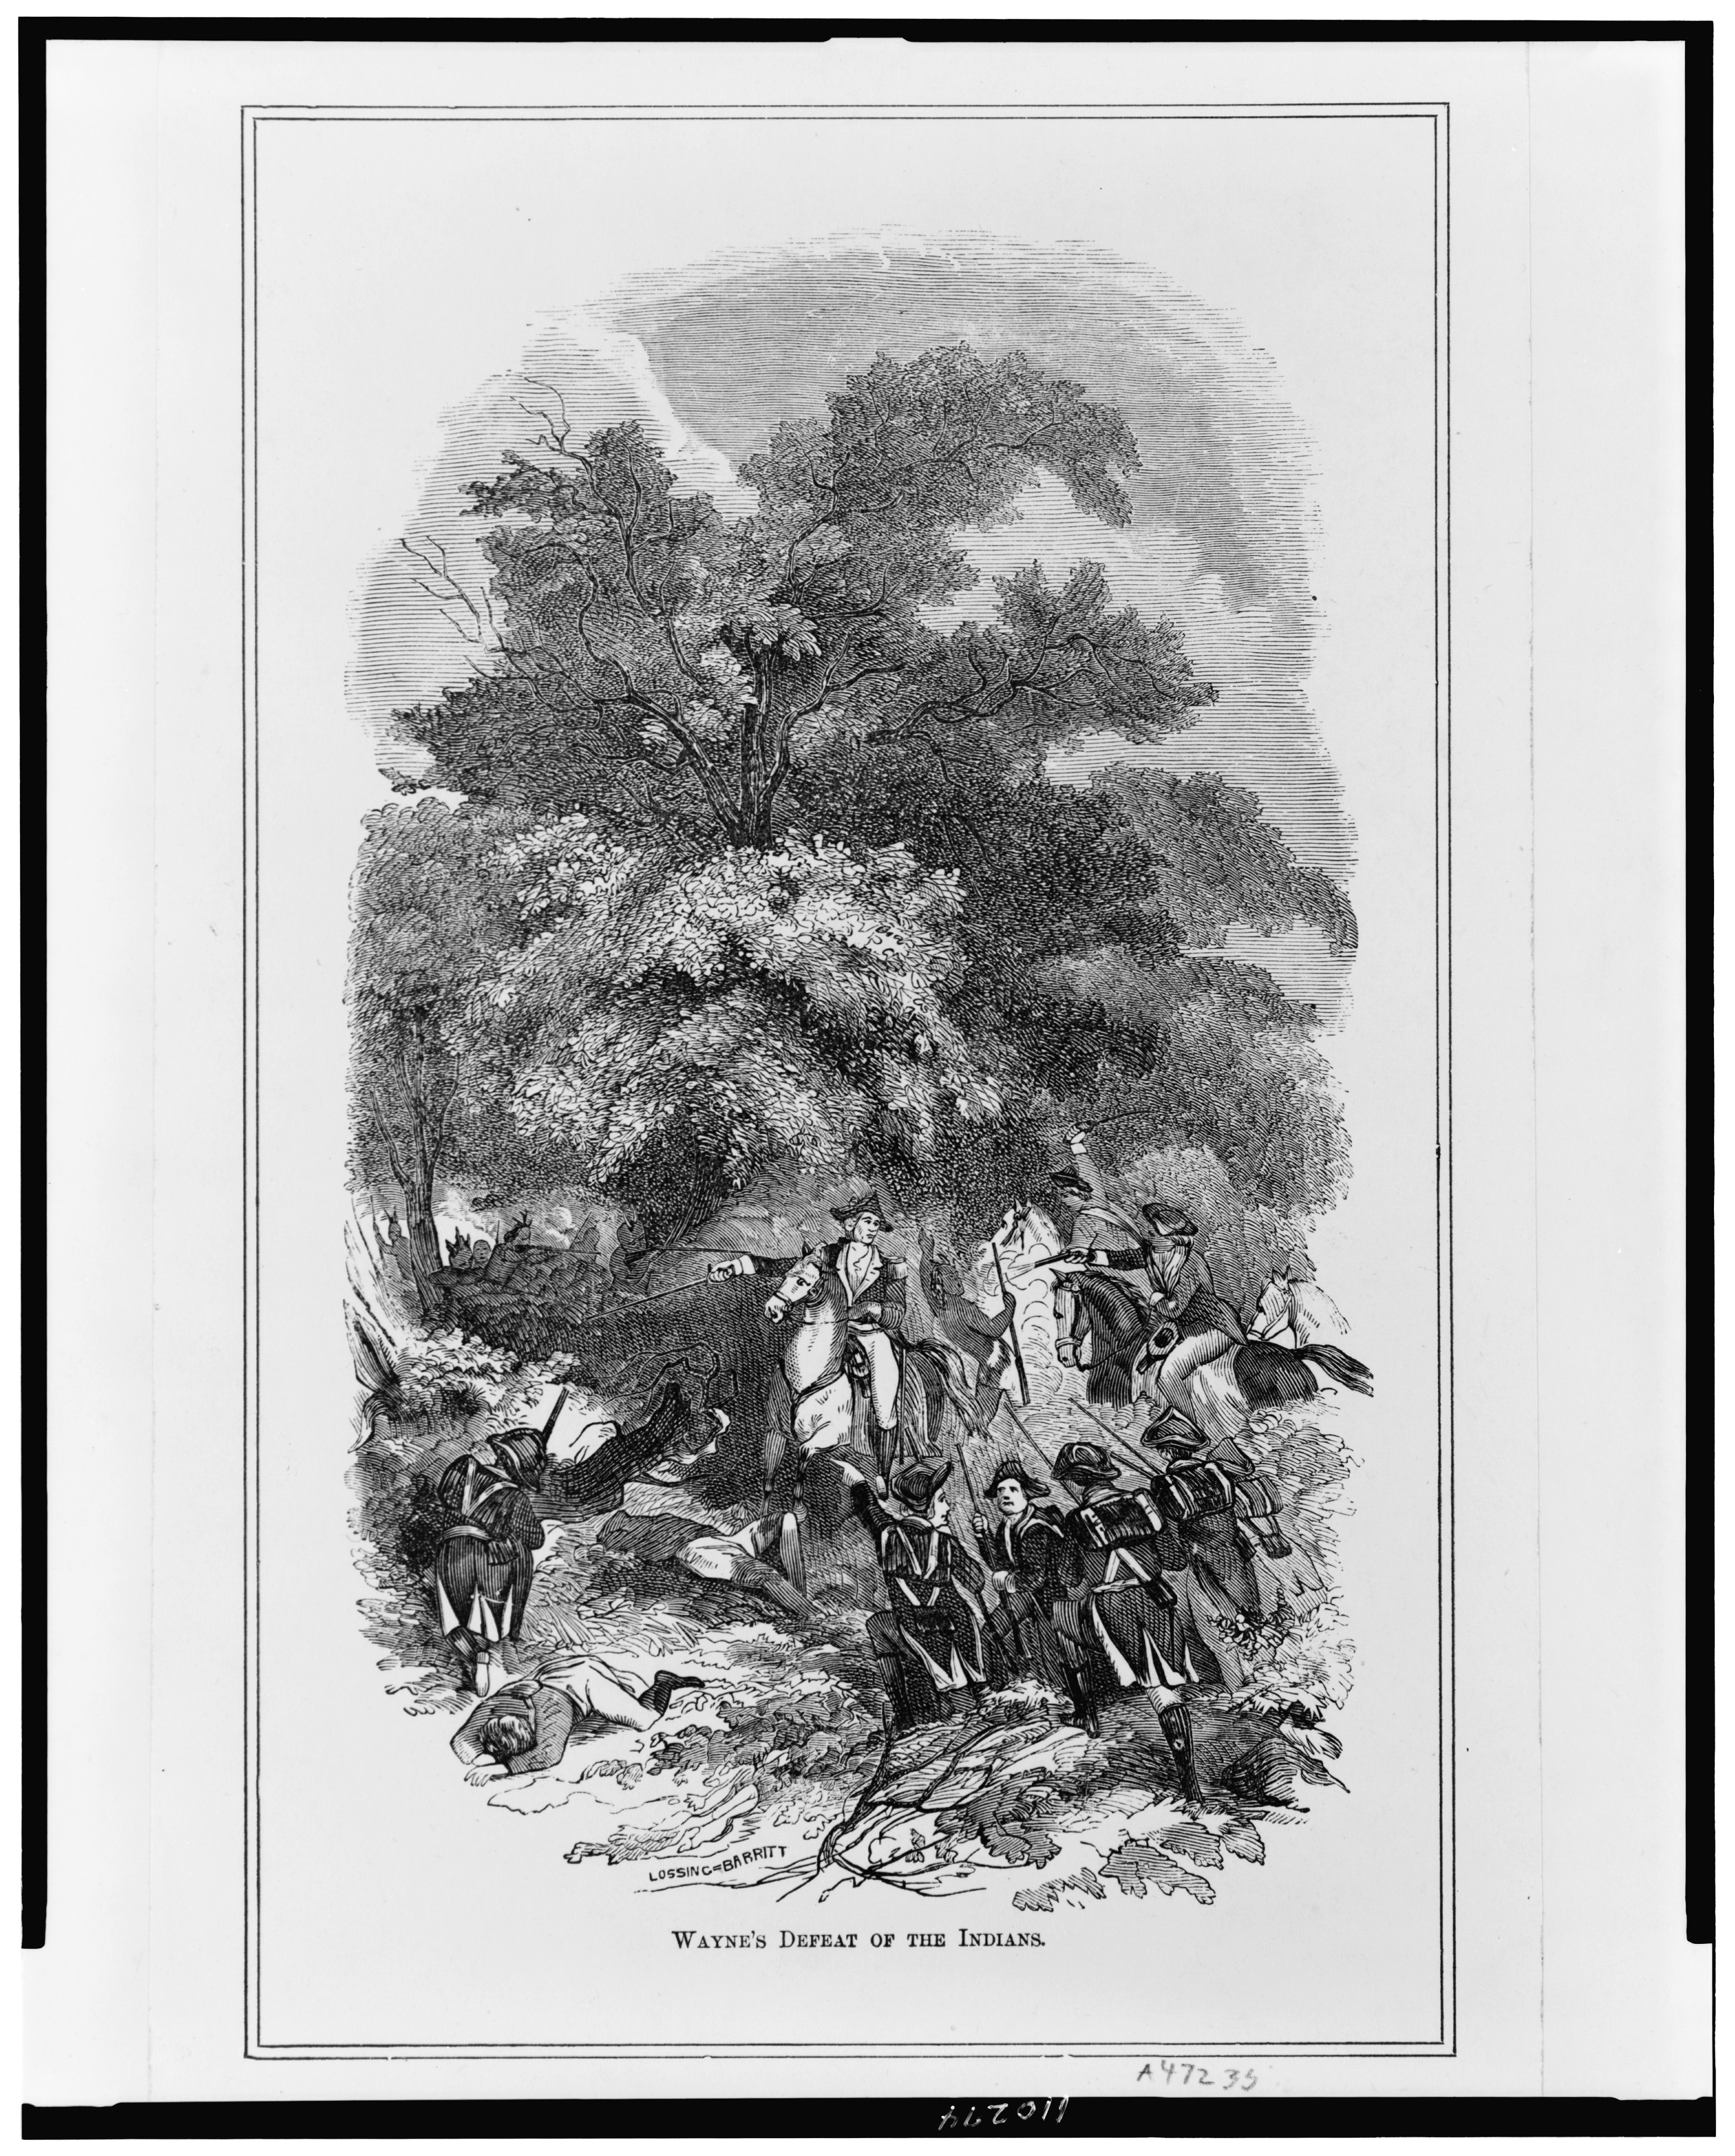
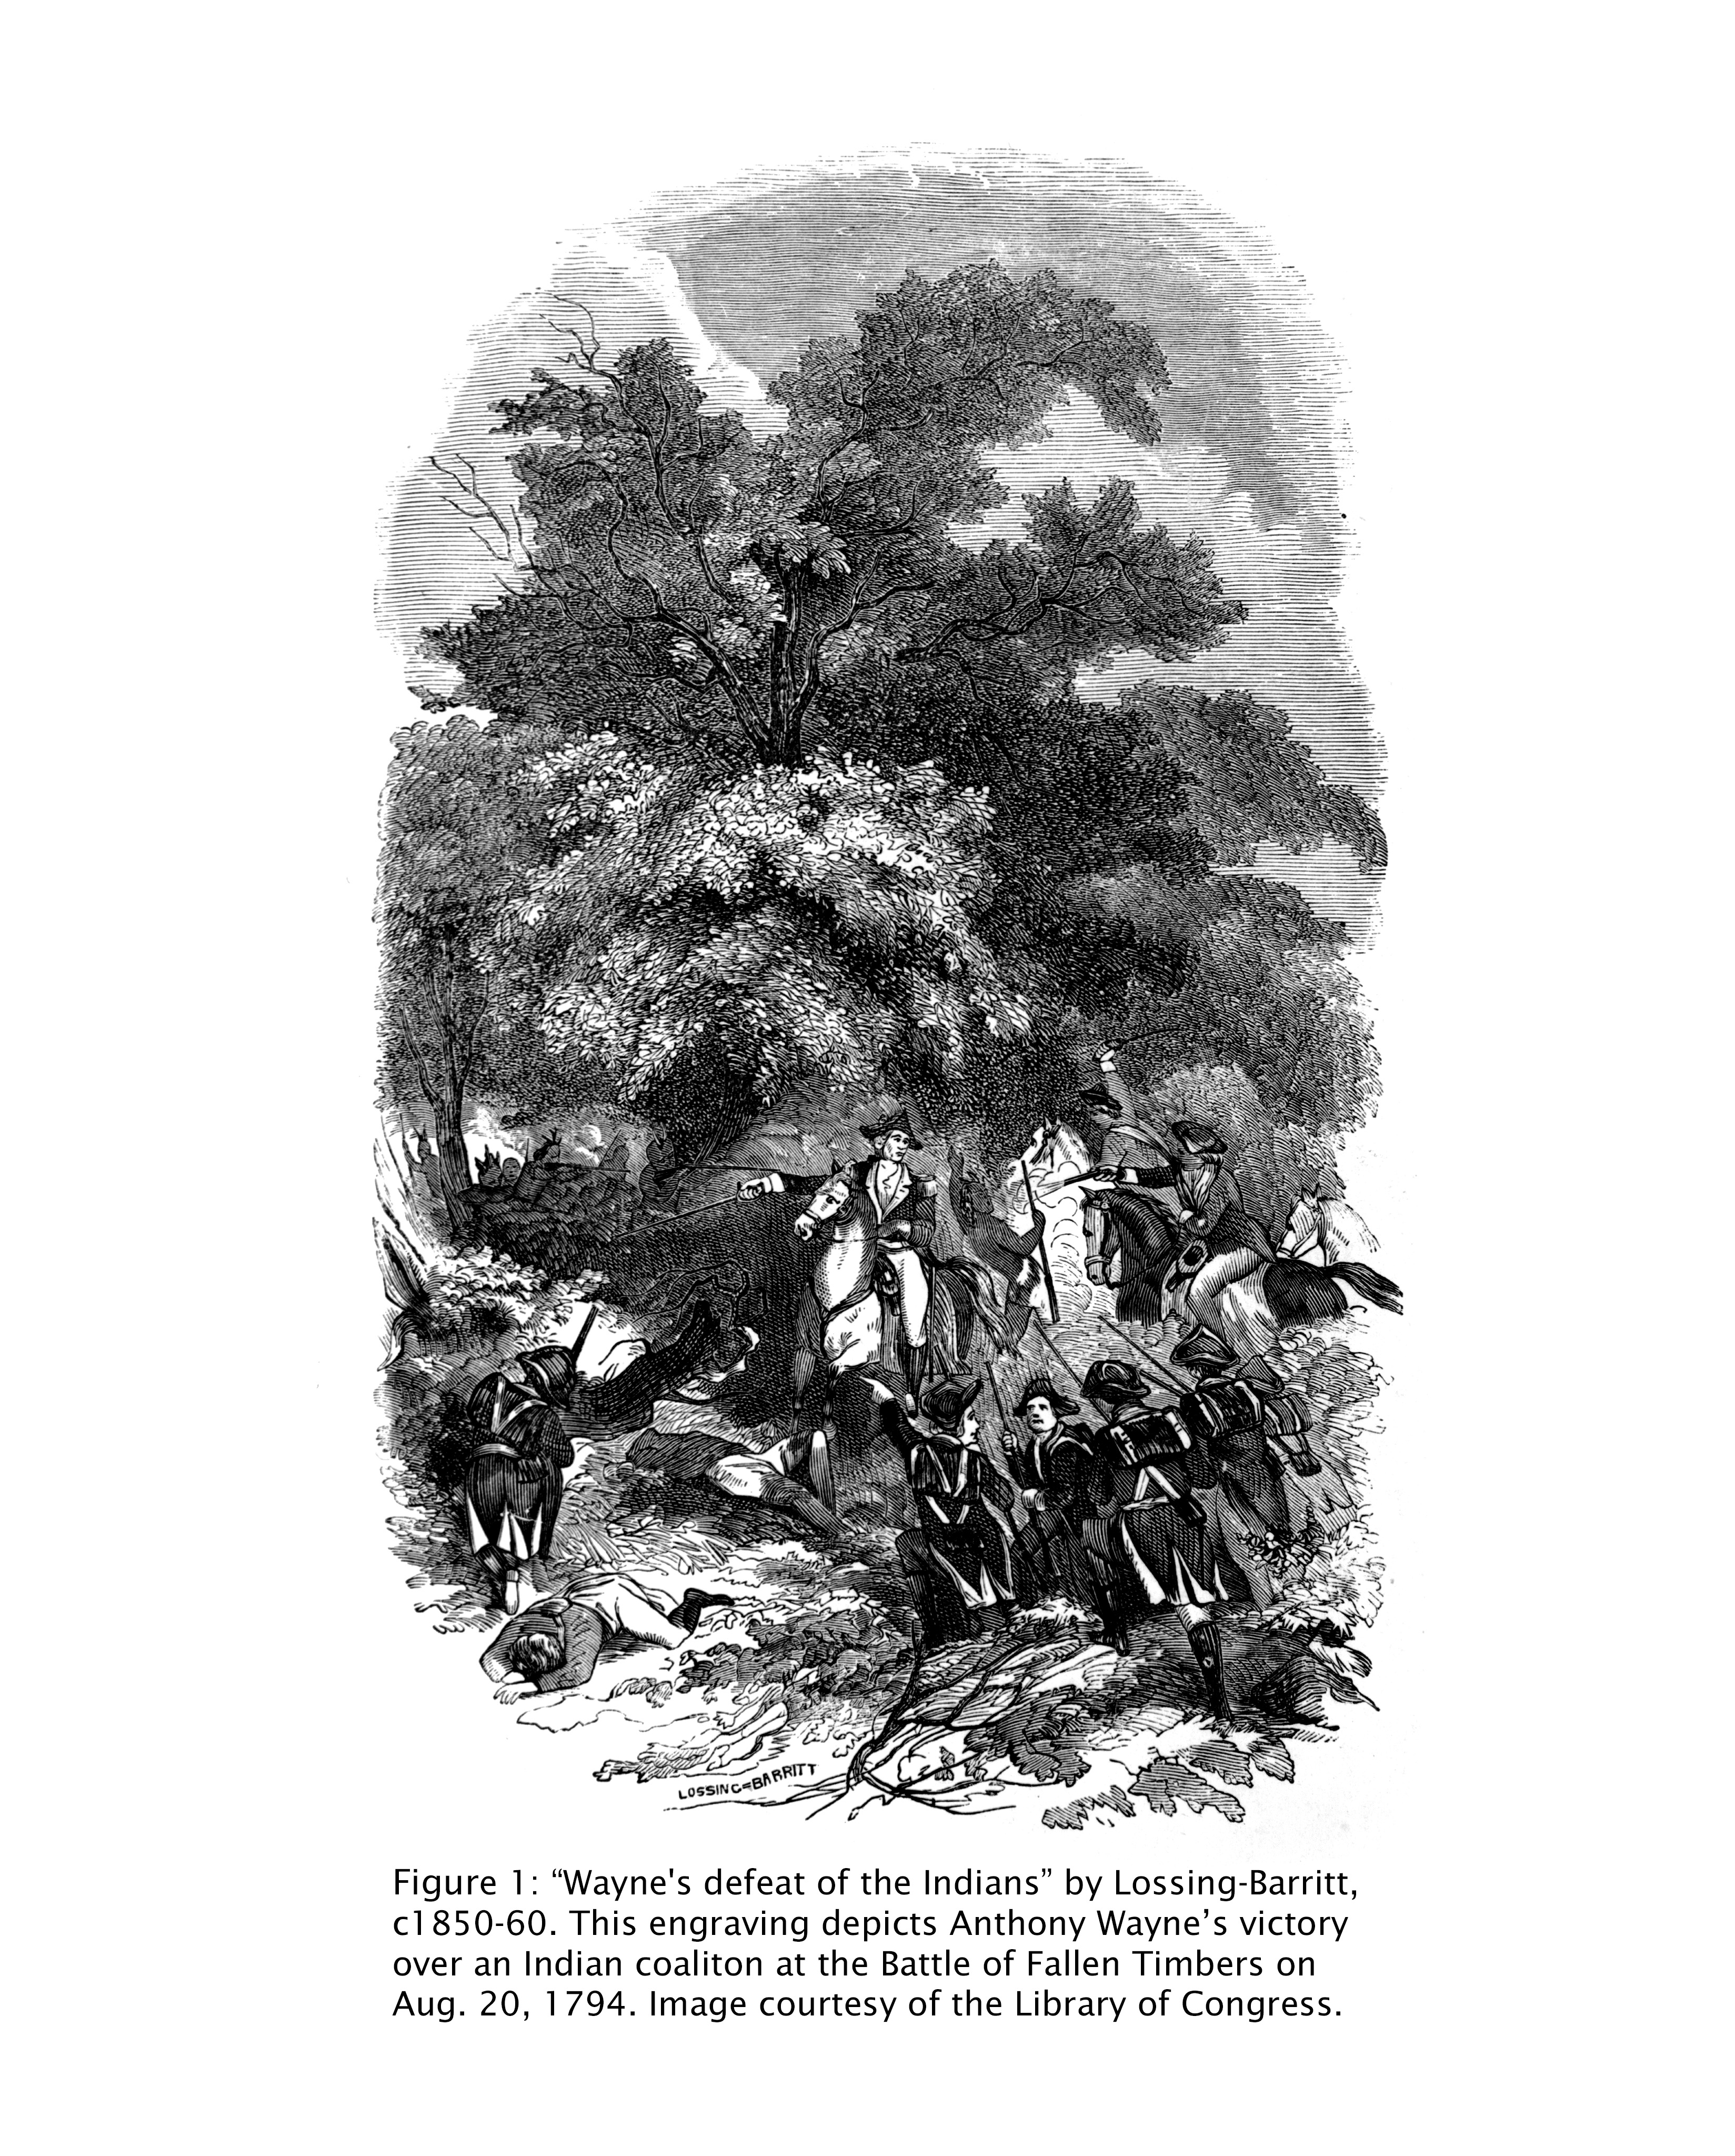
For the matted engraving, I chose a depiction of Anthony Wayne's victory at Fallen Timbers (present day Ohio) in 1794. In order to prepare this photo for a black and white printing, I removed the original border and caption. Next, I brightened out the original background of the image so that it would blend with a new white background. This also required adjusting the contrast and the intensity of the blacks and grays. Finally, I added a new caption. The before/after images can be seen below.